how to use 3d printer
Three-dimensional printing technology has transformed how prototypes are made, custom parts are fabricated, and creative designs are brought to life. From hobbyists to industrial designers, understanding how to use 3D printers effectively is becoming an increasingly valuable skill. This guide aims to demystify the process, providing a clear, step-by-step overview of the journey from a digital concept to a tangible object, covering essential aspects of setup, operation, and post-processing. It's a field that combines digital design with physical creation, offering immense possibilities for innovation and personalization across various sectors.

Understanding Diverse 3D Printer Technologies
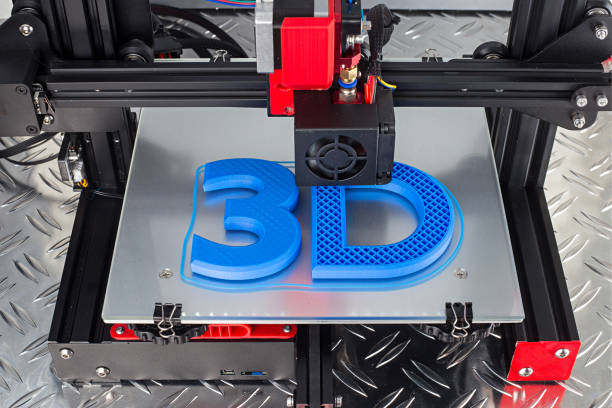
Before initiating a print, it is helpful to understand the different types of 3D Printers available, as each operates on distinct principles and excels in specific applications. The most common types include Fused Deposition Modeling (FDM), Stereolithography (SLA), Digital Light Processing (DLP), and Selective Laser Sintering (SLS). FDM printers work by extruding thermoplastic filaments, layer by layer, to build an object. They are popular for their affordability and ease of use, suitable for functional prototypes and larger models. SLA and DLP printers use liquid resin cured by a light source, offering exceptional detail and smooth surfaces, ideal for intricate models and jewelry. SLS printers use a laser to fuse powdered material, creating strong, complex parts without the need for support structures.
Preparing Digital Models for 3D Printing
The journey of how to use 3D printer begins with a digital model. This model is typically created using Computer-Aided Design (CAD) software such as Fusion 360, Tinkercad, or SolidWorks. Once designed, the model is usually exported in a standard file format like STL (Standard Tessellation Language) or OBJ (Object file). These formats represent the 3D model as a series of connected triangles. The next crucial step involves slicing software, like Ultimaker Cura, PrusaSlicer, or Simplify3D. Slicing software takes the 3D model, slices it into hundreds or thousands of horizontal layers, and generates G-code. G-code is a set of instructions that tells the 3D printer precisely how to move, where to extrude material, and at what temperature, layer by layer, to construct the physical object.
Essential Steps for 3D Printer Setup
Proper setup is critical for successful 3D printing. For FDM 3D Printers, this typically involves loading the filament into the extruder mechanism. Ensuring the filament is correctly fed and tensioned prevents common printing errors. Bed leveling is another fundamental step, ensuring the print bed is perfectly flat and at the correct distance from the nozzle. Many modern printers offer automatic or assisted bed leveling features to simplify this process. For resin printers, setup involves pouring the liquid resin into the vat and ensuring the build plate is clean and correctly installed. Additionally, configuring initial software settings within the slicer, such as print speed, layer height, infill density, and support structures, directly impacts print quality and duration.
Monitoring and Managing the Printing Process
Once the G-code is loaded onto the printer (via SD card, USB, or Wi-Fi) and the print is initiated, continuous monitoring is advised, especially for longer prints. The first few layers are particularly important, as poor bed adhesion can lead to print failure. Observing for common issues like warping (edges lifting from the print bed), stringing (fine threads of plastic between parts), or spaghetti-like extrusions can help identify problems early. Many printers offer pause and resume functions, allowing for filament changes or minor adjustments. Maintaining a stable environment, free from drafts and significant temperature fluctuations, can also contribute to more consistent print results. Understanding these aspects is key to mastering how to use 3D printer technology effectively.
Finishing and Post-Processing 3D Prints
After a print is completed, post-processing is often necessary to achieve the desired final appearance and functionality. For FDM prints, this typically involves carefully removing the printed object from the build plate and then removing any support structures that were used to prevent overhangs from collapsing during printing. Tools like pliers, cutters, or spatulas can be helpful. Further refinement might include sanding the surface to remove layer lines, filling gaps, or painting the object for aesthetic purposes. For resin prints, post-processing is more involved. Objects must be thoroughly washed in isopropyl alcohol to remove uncured resin and then cured under UV light to fully harden the material. Safety precautions, such as wearing gloves and eye protection, are important during this stage, particularly when handling uncured resin.
General Cost Considerations for 3D Printers
The cost of 3D printers varies significantly depending on the technology, features, build volume, and brand. Entry-level FDM printers are generally the most affordable, making them accessible for hobbyists and educational purposes. Mid-range FDM printers offer larger build volumes, enhanced features like auto-leveling, and often better print quality and speed. Professional-grade FDM printers are designed for industrial use, supporting advanced materials and offering high reliability. Resin printers, while offering superior detail, also come in various price points, with entry-level models suitable for small, intricate objects and professional versions for high-volume or specialized applications.
| Product/Service Type | Typical Provider Examples | Key Features | Cost Estimation |
|---|---|---|---|
| Entry-Level FDM | Creality Ender, Anycubic Kobra | Basic functionality, smaller build volume, suitable for beginners | $150 - $400 |
| Mid-Range FDM | Prusa i3 MK4, Bambu Lab P1P | Larger build volume, improved speed, better print quality, advanced features | $500 - $1,500 |
| Entry-Level Resin | Elegoo Mars, Anycubic Photon | High detail, smaller print volumes, ideal for miniatures and jewelry | $200 - $600 |
| Professional FDM | Ultimaker S5, Raise3D Pro3 | Large format, multi-material capabilities, industrial reliability | $2,500 - $10,000+ |
| Professional Resin | Formlabs Form 3+, Phrozen Mega | High precision, large scale resin prints, specialized materials | $3,000 - $20,000+ |
Prices, rates, or cost estimates mentioned in this article are based on the latest available information but may change over time. Independent research is advised before making financial decisions.
Conclusion
Mastering how to use 3D printer technology involves understanding the various types of printers, preparing digital models meticulously, performing correct setup and calibration, monitoring the printing process, and applying appropriate post-processing techniques. While the initial learning curve can seem steep, the rewards of bringing digital designs into the physical world are substantial. With continuous practice and attention to detail, individuals can unlock the full potential of 3D printing for both personal projects and professional applications, contributing to innovation across diverse fields.


